A complete guide on how to automate System Cleanup on Windows 10 & Windows 11
Automate System Cleanup on your Windows 10 | It is frustrating when your system works slow or run out of space because of unnecessary files. It is the situation when your computer does not work as per your requirement or as expected. You think why my system is slow even I have good configuration system. yes, it depends on your configuration like RAM and CPU power, but in most cases, this does not help because the size of unnecessary temp exceeds the folder size then your computer goes out of the score.
In this post, we will discuss step by step how to configure and clean your system automatically whenever you turn on the system. This can be applied to the windows server also. Just follow these steps to make your system run like a pro.
Before moving head here is the guide on which folders can be safely removed from the system to improve system performance. A guide on how to do cleanup to Improve System Performance of windows 10 & 11understand Click here to read.
Let’s Follow the below steps by step guide on how to automate System Cleanup on Windows 10 & Windows 11
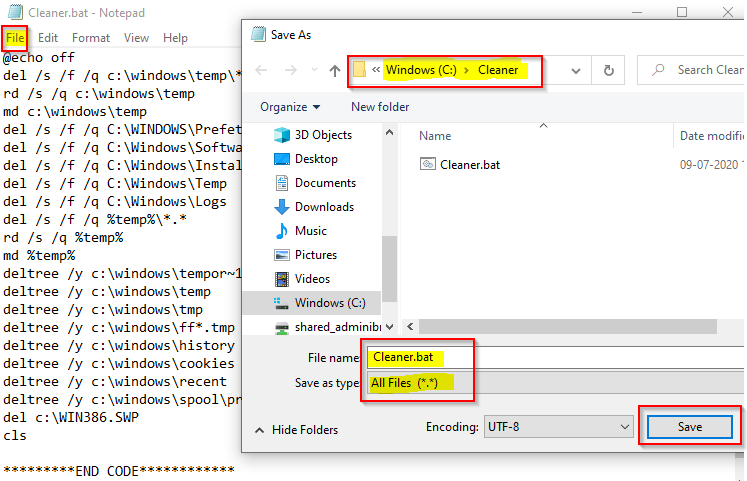
1. Copy below code text to the notepad and save notepad as Cleaner.bat
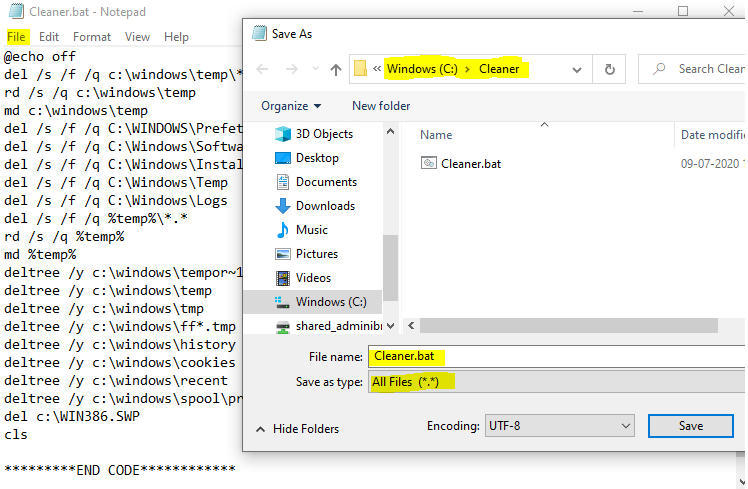
Below is the batch code we can use to clean all junk files from the system ( windows 10 and windows 11). But make sure you save it as Cleaner.bat in another drive like E of D drive in an individual folder so that it will not be accidentally deleted. Also, make sure you set to save as type to all files.
@echo off
del /s /f /q c:\windows\temp*.*
rd /s /q c:\windows\temp
md c:\windows\temp
del /s /f /q C:\WINDOWS\Prefetch
del /s /f /q C:\Windows\SoftwareDistribution
del /s /f /q C:\Windows\Installer\$PatchCache$\Managed
del /s /f /q C:\Windows\Temp
del /s /f /q C:\Windows\Logs
del /s /f /q %temp%*.*
rd /s /q %temp%
md %temp%
deltree /y c:\windows\tempor~1
deltree /y c:\windows\temp
deltree /y c:\windows\tmp
deltree /y c:\windows\ff*.tmp
deltree /y c:\windows\history
deltree /y c:\windows\cookies
deltree /y c:\windows\recent
deltree /y c:\windows\spool\printers
del c:\WIN386.SWP
cls
****END CODE****
rd = remove (delete) a directory.
/S = removes all directories and files in the specified directory in addition to the directory itself.
/Q = quiet mode: suppresses prompts for delete confirmations.
/P= Prompts for confirmation before deleting each file.
/F = Force deletes read-only files.
/A= Deletes files based on one of the following attributes:
Md= To create a directory
Del= Deletes one or more files. This command performs the same actions as the erase command.
2. Open task scheduler from computer management | Automate System Cleanup on your Windows 10
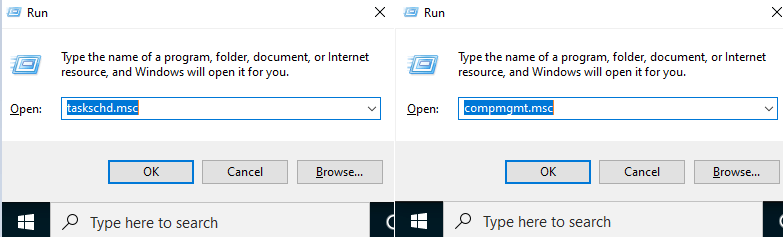
Now you will need to open the task scheduler from computer management. You can either press win+r and type compmgmt.msc or type taskschd.msc. Other way you can right click on start menu and select computer management.
3. Create basic task under task scheduler
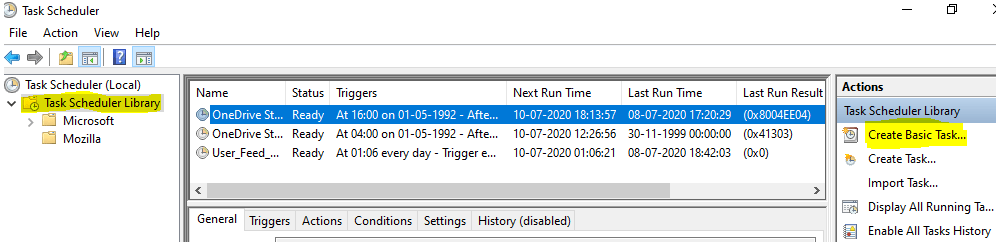
Once the task scheduler is open you will need to click and expand task scheduler library. Then on left side create basic task.
4. Type name and select

Once you click task scheduler library it will ask to type name of your task type anything like cleaner then click next. it will come to trigger tab ‘when do you want the task to start?’ select when the computer starts or as per your preference. Click next again.
5. Select start a program
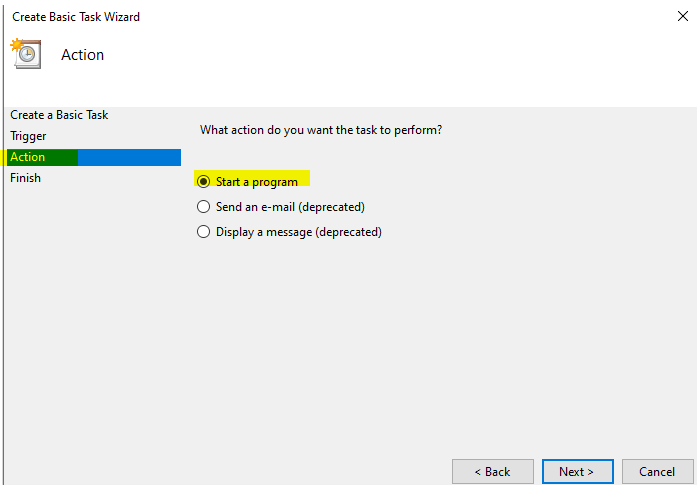
On action tab choose first option start a program. Click next
6. Select the program
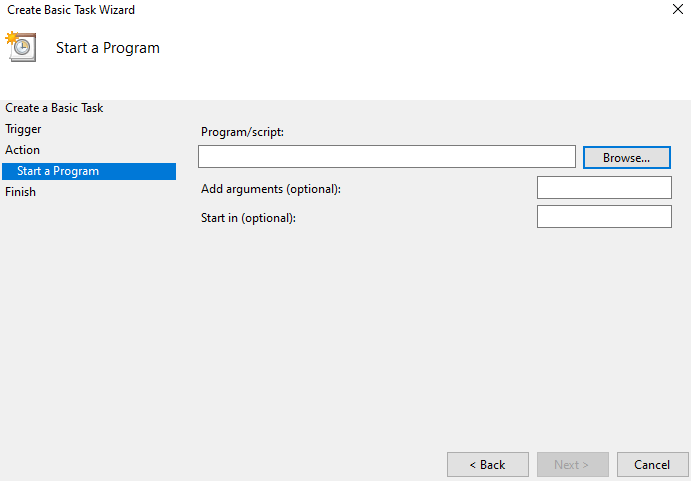
On Next tab it will ask to select a program. click on browse and open the folder where you saved the earlier cleaner.bat file. Add argument and start in is the optional you can leave them blank. Then click on next and finish.
7. Test the scheduler program
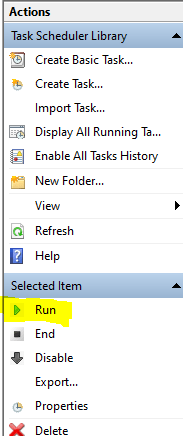
Once the scheduler program is setup. You can test your connection. select the program and on right panel click on Run.
Automate System Cleanup on your Windows 10 & Windows 11. Restart your computer and test the program if it is cleaning the system. This is the complete process of setting up the automatic system cleaner. once you power on the system this will be done automatically. hopefully this should help. Below is the complete batch script you can copy.
Copy the complete code

@echo off
del /s /f /q c:\windows\temp\*.*
rd /s /q c:\windows\temp
md c:\windows\temp
del /s /f /q C:\WINDOWS\Prefetch
del /s /f /q C:\Windows\SoftwareDistribution
del /s /f /q C:\Windows\Installer\$PatchCache$\Managed
del /s /f /q C:\Windows\Temp
del /s /f /q C:\Windows\Logs
del /s /f /q %temp%\*.*
rd /s /q %temp%
md %temp%
deltree /y c:\windows\tempor~1
deltree /y c:\windows\temp
deltree /y c:\windows\tmp
deltree /y c:\windows\ff*.tmp
deltree /y c:\windows\history
deltree /y c:\windows\cookies
deltree /y c:\windows\recent
deltree /y c:\windows\spool\printers
del c:\WIN386.SWP
cls

*********END CODE************
Share this content:
Leave a Reply